
Bone Broth Recipe: Secrets From Someone Who's Made 250,000 Litres of it
Bone Broth Recipe Using Real Bones
Learn secrets and the best bones for broth gained from making 250,000 liters of it.
Books and articles do not share what I’m about to tell you in order to make bone broth that specifically isolates the gelatin and collagen into a delicious and nutritious broth.
Follow this chicken bone broth recipe and your broth will be so thick you can hold it upside down in a cup.
Why am I sharing my secrets? I am so passionate about bone broth that I want you to enjoy it, regardless of whether you purchase mine or make it yourself.
Bone broth helped me through some devastating injuries. I believe it can help you feel better, no matter what you’re dealing with.
A quick disclaimer, I make the best tasting bone broth you'll ever try. So if you get discouraged trying to make your own, I encourage you to try mine.
Click HERE to jump to the recipe.
Bone broth should be available to everyone. If you cannot afford ethically sourced organic bone broth, it doesn’t mean that you can’t make it.
My mission is to make bone broth equitable for everyone. Enough about me.
I’m going to assume you know a bit about bone broth. Maybe you know some of the benefits or that it is good for you.
Sally Fallon says it best:
“Homemade broth, of course, is a whole food product. It's a slow food, whole food, and real food that has been nourishing and healing people for tens of thousands of years.”
Is Homemade Bone Broth Really That Good For You?
Bone broth provides nutrients, proteins and amino acids that we lack in our western diet.
These amino acids are crucial to maintaining healthy collagen levels in your body.
If you do not pay attention to these amino acids, you will age quicker as they are incredibly important to collagen formation as you age.
The vitamins, electrolytes, minerals and amino acids in bone broth assist to:
Heal Your Gut
Amino acids (like glycine) improve your digestion by decreasing inflammation in your gut.
Gelatin also increases gastric juices in your gut, which helps with digestion.
Build Skin, Hair, Teeth, Nails That Look Healthy
Collagen in bone broth provides building blocks for your body to produce healthy skin, hair, teeth and nails.
Promote Joint Health
Collagen and other amino acids increase the connective tissue around joint cartilage. Bone broth also has glucosamine and chondroitin, a potent combination used to treat joint pain and arthritis.
Control Your Blood Sugar
The proteins in bone broth help you control your blood sugar. You are best to drink bone broth before your meals to get these benefits.
Help Stabilize Your Mood
Amino acids in bone broth help you relax and stabilize your mood. Glycine, the main amino acid is an inhibitory neurotransmitter, much like GABA. These neurotransmitters have a natural calming effect on your nervous system.
Help You Sleep by Regulating Body Heat
The main amino acid in bone broth (glycine) i shown to help reduce your core body temperature as you drift off into sleep. This helps to promote a restful, restorative sleep.
What is the Difference Between Bone Broth and Stock?
Stocks simmer for less time than bone broth. Stocks typically cook for 2-5 hours while bone broth simmers for 12-48 hours.
Stocks also use primarily just bones and scraps from around the kitchen. On the other hand, bone broth uses meaty bones with connective tissue. Learn all the differences between stock and broth.
Now onto step one for making bone broth.
Find Your Best Bones, Vegetables, Herbs and Spices
Sourcing the best bones for bone broth is difficult. They should be pasture raised and from ethical farms.
Beef bones must be pasture raised and grass fed. Organic is a great option as it provides independent 3rd party validation. Side note: all beef is grass fed for part of their life.
The best beef bones for bone broth are grass finished. They are really the gold standard in terms of quality. But there is no certification for it, so you must be confident your source can back up their claims.
The best chicken bones are Non-GMO and have access to pasture at the very least.

There are too many buzzwords like cage free and free range/run in the chicken industry to mislead you.
Want to hear something surprising? If given the choice, chickens prefer to be indoors in a barn compared to outdoors where there is bad weather (heat or cold) and predators.
The image of chickens frolicking around endless pastures is a bit of a farce, sadly.
3rd party validation is particularly important for sourcing chicken. It’s a messy industry rife with big companies treating farmers and chickens like garbage.
Because of documentaries and media, beef gets a bad reputation.
I would argue chicken is a worse industry from an animal welfare perspective. It’s not even close.
Regardless of my thoughts on this, 3rd party validation for sourcing meat and bones is incredibly important.
How to Find Pasture Raised Meat and Bones
Perfecting your bone broth recipe requires the best bones you can find. Quality bones are harder to come by every year.
There are many bone broth companies (like me) that are buying up all of the bones. This drives up the price and makes choice bones difficult to find for you.
That being said, I can still find bones in my local community here in Vancouver. I can offer a couple of suggestions for you to do the same.
- Talk to your local butcher (if you have one). Check the freezer section of your local market or grocery store. Oftentimes the bones are hidden at the darkest sections of the meat freezer. Ask the meat department if they can special order bones for you. I’ve done this at many stores.
- Farmers markets are another option. Don’t be afraid to ask the farmers if they have bones for sale. Sometimes they don’t bother bringing them to the market or marketing them.
- Nowadays, many farmers sell directly to you online, including bones. I have a couple of trusted beef and lamb sources in B.C (comment below if you’re interested). CSA’s or buying clubs allow you to purchase bones in bulk. This way you can negotiate better rates and share your prized bones with your friends.
When in doubt, do things that directly support local farms, they need it.
What are the best bones for bone broth?
The best bones for bone broth are:
- Beef knuckle and marrow bones.
- Chicken feet, wings, drumsticks, necks and carcasses, in that order.
First decide which type of bone broth you want to make. You can make the classics: beef and chicken. Or you can venture into game meats, turkey, duck or lamb.
You can also do a mixture of different animals, which is delicious! The perfect recipe calls for a mix of bones.

Beef Bones For Bone Broth Flavor
Beef bones are generally classified into two types: marrow and knuckle. Marrow bones are the legs and arms. Also referred to as ‘pipes’ because they look like pipes. Marrow bones are long and skinny and have marrow in the middle.
They’re usually cut to 2-3 inch pieces. You certainly don’t want a whole leg or arm bones in your bone broth recipe. Check the image below for what it should look like when cut properly.

Knuckle bones are the joints of the ruminant. Think knee, hip, rib cage. These are big ‘working’ bones which are usually cut into smaller 2 inch chunks as well.
They have more cartilage and connective tissue. When frozen, look for red colouring on the bones to tell if they are knuckles.

You need both marrow and knuckle bone to make the best bone broth. I recommend mixing 50% of each type. You can also use oxtail or short ribs. Any meaty bones do well in bone broth.
Chicken Bones For Cooking Your Bone Broth
Making chicken bone broth requires a mix of bones as well. If you roast a chicken or have leftover chicken parts, freeze them for later use. These work great in any chicken bone broth recipe.
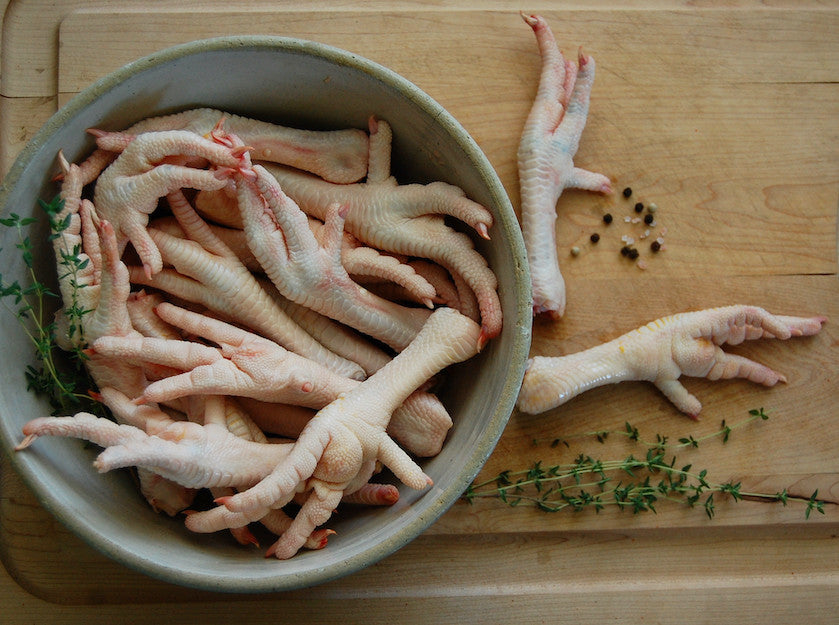
The absolute best bones for chicken bone broth are feet. Chicken feet give you a rich, concentrated broth. You can use approximately ⅓ feet to chicken carcasses (by weight) for a delicious broth.
But chicken feet are notoriously difficult to find. And they look gross.
If you can’t find chicken feet then you’ll need to use more chicken carcasses (neck is usually included) and chicken wings / drumsticks.
Wings and drumsticks are rarely used, but they make fantastic, gelatinous bone broth. In this case, use half chicken carcasses and half wings / drumsticks by weight. Whole chickens (with meat on) work great as well.
What Are the Best Vegetables For Bone Broth?
The best vegetables for bone bone broth are organic vegetables and herbs as they have less pesticide residue than conventional.
Vegetables and herbs are needed to add flavor and nutrients to your bone broth recipe.
Vegetables can be loosely chopped into 2-3 inch chunks. Onions can be quartered (leave the skin on), carrots (unpeeled) and celery chopped into thirds.
Parsley, rosemary, thyme, bay leaves can be tossed in whole. Use ugly vegetables when possible, because, who cares what they look like? For salt, I use sea salt or pink himalayan.
What Other Things Do I Need to Make Bone Broth?
Stock Pot
I recommend at least a 5L stock pot. Making bone broth takes a ton of planning and effort. The yield of finished bone broth is quite low compared to what’s in the pot. If you use anything less than a 5L pot then you’re doing lots of work for not much bone broth.

Strainer
A fine mesh sieve style strainer is best to ensure you remove all the fine particles from your finished bone broth.
Spider Strainer
This makes it easier to remove the solids from your pot before straining in the fine mesh strainer.
Cheese Cloth
To save yourself extra cleanup time. Wrap all of your bones and vegetables in cheese cloth. This way the cheese cloth keeps everything from staining the bottom of your pot. Then once your bone broth recipe is finished, you simply remove the cheese cloth bundles, place in compost, and you’re done.
Large Sheet Style Roasting Pan
Optional if you want to roast your bones.
The Absolute Best Bone Broth Recipe
So you’ve chosen your bones, vegetables, herbs and spices… now what?
Let’s make bone broth!
- Choose which type of bone broth you want to make. This will determine the bones you need to use.
- Preheat oven to 450 F. Place your bones on roasting pan. Roast for 40 minutes, tossing them halfway through. You want the bones to caramelize and become brown while roasting. This gives your bone broth amazing flavour that you can’t achieve without roasting. You can toss them in tomato paste before roasting for a rich flavor.
- Add roasted bones to your large stock pot, crock pot or dutch oven. Scrape any brown bits from your roasting pan into the pot as well. These add even more flavour to your bone broth recipe.
- Add 12 cups of water to your pot. The bones and water in your pot should resemble a cup full of ice cubes, then filled with water.
- Bring to a boil over high heat. You can cover the pot while waiting for it to boil to speed things up. Once boil is achieved, lower heat so broth is an aggressive rolling simmer.
- Skim foamy bits and impurities that bubble up to the surface. Skim 2-3 times as needed over the first 1.5 hours. Learn more about skimming practises here. You’ll eventually get it all. You need to skim these off and remove from the pot in order to ensure your bone broth cooks correctly. Otherwise you risk cloudy broth. Which is not good.
- Simmer for 12-24 hours.
- Add your vegetables, herbs and spices when you have approximately 3 hours of simmer time left. This ensures they do not cook down to mush and make your broth starchy.
- Do not ever stir your bone broth. Simply leave it all to simmer on it’s own.
- Remove solids (bones, vegetables), strain and store for use.

What to Do With Bone Broth
Enjoy your hard made bone broth on it’s own or in your meals. It is a culinary secret that works great in any recipe you are cooking. You can add it to whatever you are cooking from stir frys to steamed vegetables or to deglaze a pan.
The perfect base for any dinner, soup or sauce
You can use it in stir frys, to steam vegetables or add it to pasta sauces and salad dressings.
It’s also a great way to add collagen protein to your grains. Replace water with bone broth when cooking any grain: quinoa, rice, etc.
Or drink it straight. For a primer on transforming your cup, read our guide to making bone broth taste better.
How to Store Bone Broth to Maximize Flavor
Once strained, store your bone broth in glass jars / containers. It will keep in the fridge for up to 7 days. Bone broth freezes extremely well. Make sure there is a bit of space in your container for your bone broth to expand when frozen.
Bone broth keeps in the freezer for about one year.
A kind offer just for you
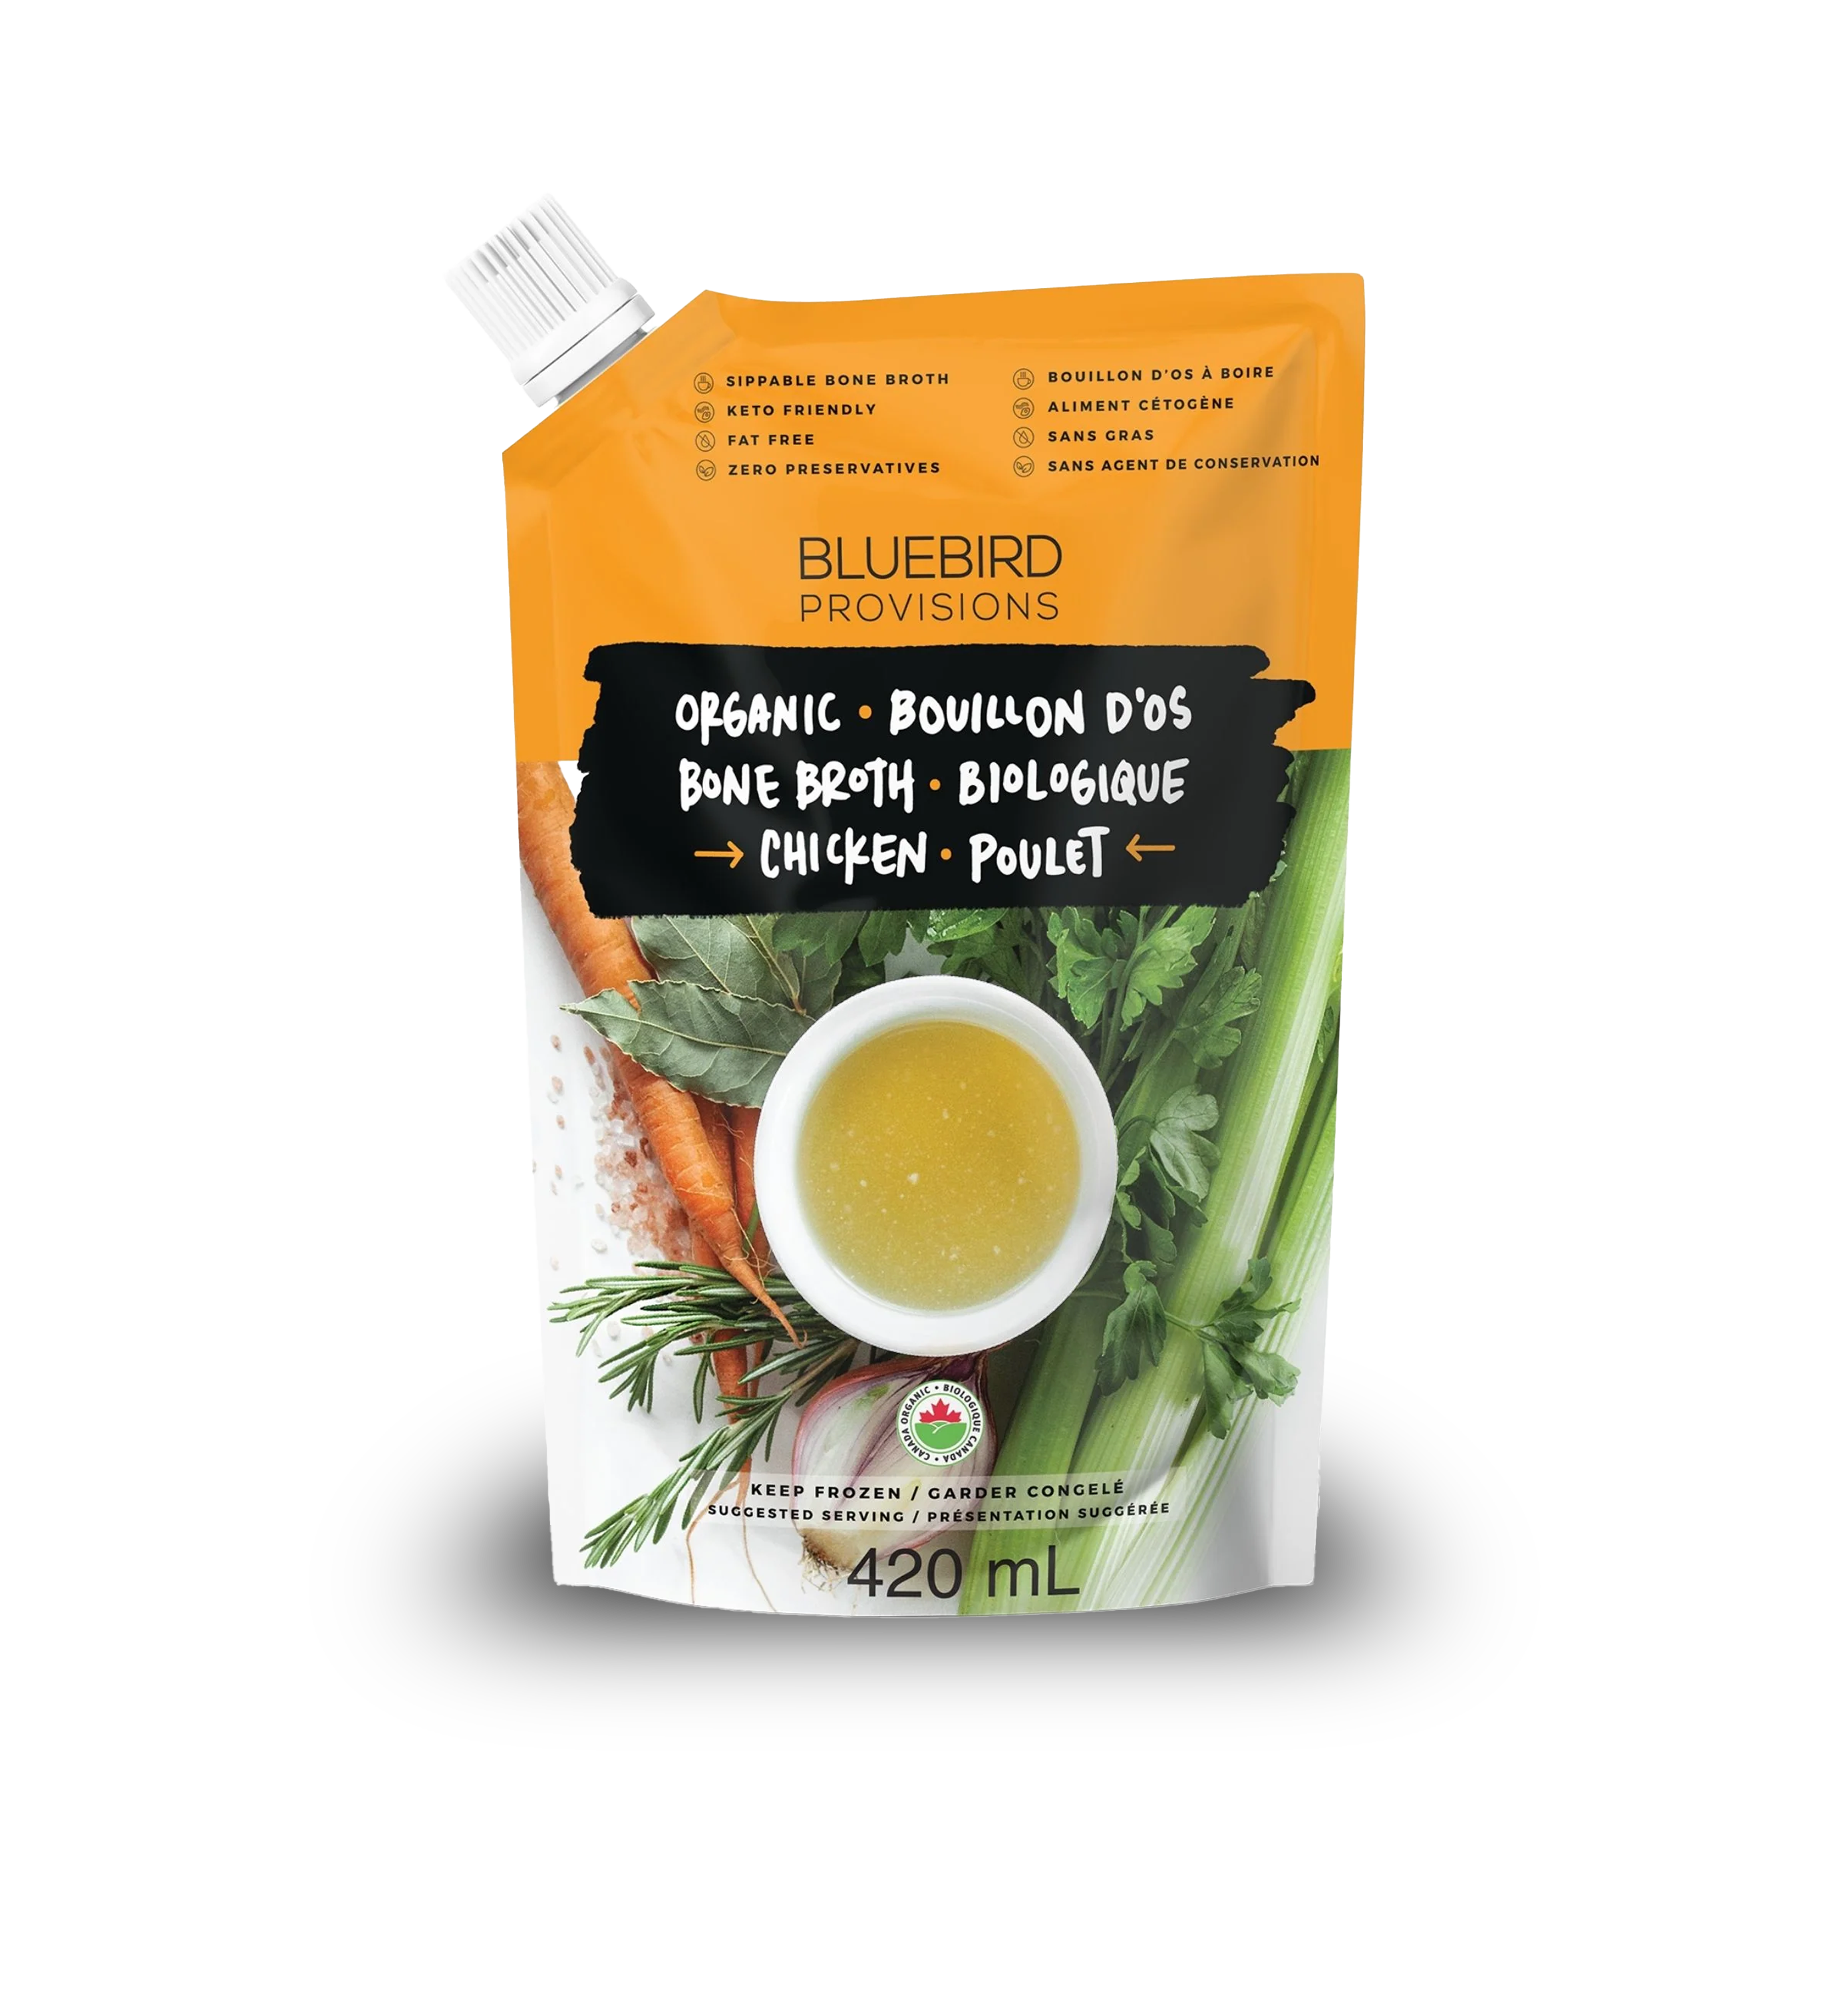
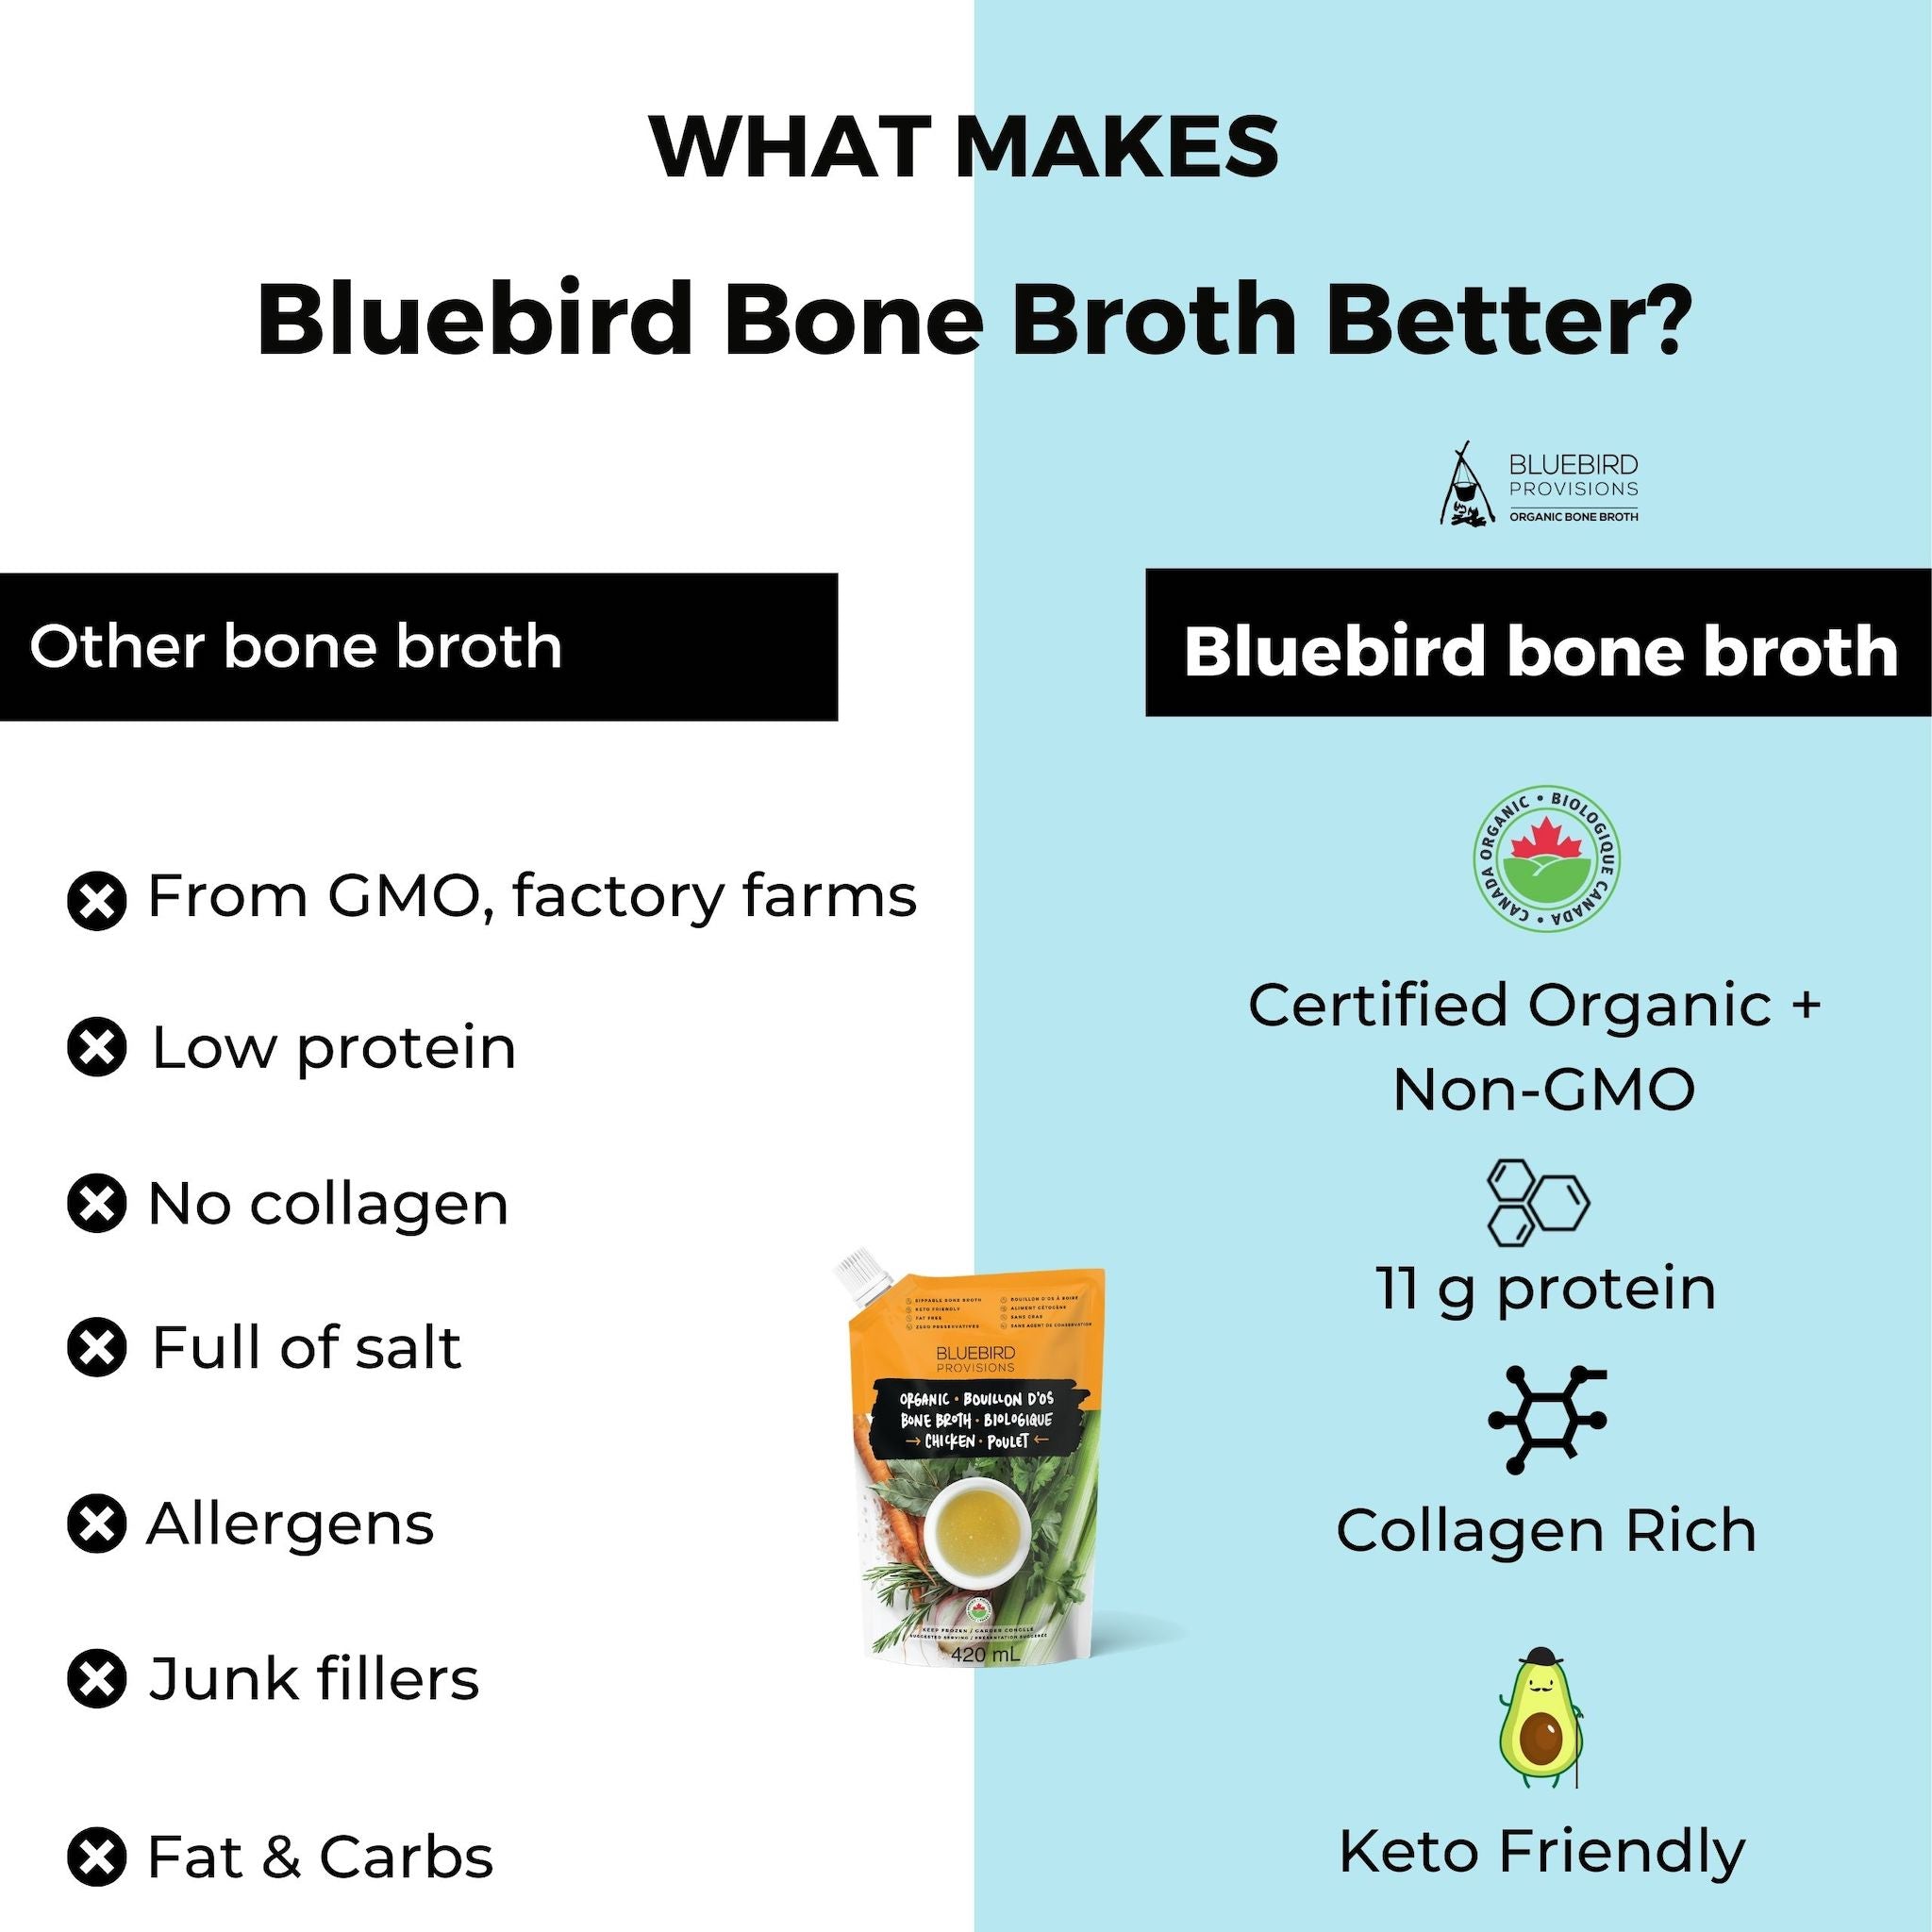
Are you short on time or can’t be bothered to make bone broth? Give my bone broth a try.
You get all of the nourishing benefits without the hassle of making it. Trust me, I know how difficult it is to nail the recipe.
Bone Broth Nutrition Information*:

Serving size: 240 mL
Calories: 30
Fat: 0.2 g
Carbohydrates: 0.3 g
Protein: 8 g
Sodium: 140-200mg (depends if you add salt)
*Assumes you remove all fat (it’s better for cooking anyway).
Chicken Bone Broth Recipe
Ingredients
1/2 lb chicken feet
2.2 lb chicken carcasses, necks, wings, bones
13 cups water
1 onion, in quarters (skin on)
2 carrots, roughly chopped
2 celery sticks, roughly chopped
10 sprigs Italian flat leaf Parsley
2 bay leaves
10 sprigs Rosemary
Salt (optional) - Add salt after cooking to taste, not during.
Instructions to make chicken bone broth
- Preheat oven to 450 F. Layout chicken bones on a baking sheet. Roast for 40 minutes, tossing half way through and / or until golden brown.
- Remove chicken bones from pan, place in stock pot (Note: This can also be done in Crock-Pot*, Instant Pot or slow cooker).
- Add water until bones are covered (try 13 cups).
- Boil everything, then reduce to hard simmer.
- Skim like crazy! 3 times as needed over the first 1.5 hours.
- Simmer chicken bone broth for 12-16 hours.
- Leave the lid off. Allow your chicken bone broth to naturally reduce.
- With 3 hours of simmer time left, add your vegetables, aromatics, herbs.
- After simmer complete, remove solids with spider strainer or other.
- Strain through a mesh strainer if you have one.
- Transfer jars / containers to the fridge to cool.
- Remove fat cap from your jars if desired.
- Chicken fat is referred to as chicken schmaltz. It is my favourite fat to cook with.

Troubleshooting / FAQ’s About Making Bone Broth
Why is my bone broth cloudy?
Your bone broth is white or cloudy for two reasons. One, you may have neglected to skim the fat, foam and impurities off the top of your bone broth during the first 1.5 hours of simmer time.
Two, you may have stirred your broth. Never stir bone broth, just leave it to simmer on it’s own. If you repeatedly have cloudy broth then skim more fat off to top during your simmer. It is still delicious and safe to consume.
Why didn't my bone broth gel?
Your bone broth didn’t gel for a few reasons:
- You didn’t use enough bones to water in your pot. It should resemble a cup full of ice cubes, then filled with water.
- You didn’t use bones with connective tissue (chicken feet, wings or beef knuckles)
- You didn’t cook your bone broth hot enough or long enough. Hotter the better. It should be an aggressive rolling simmer throughout the cook.
Why is my bone broth greasy?
Your bone broth is greasy because you did not skim all of the fat off the top before you stored it. This is a simple solution. Skim all of the fat off of your bone broth once it is refrigerated. Or you can skim the fat while it is cooking in your pot.
Why does my bone broth taste like water?
Your bone broth tastes like water because you didn’t use enough of the right bones and/or you didn’t cook your broth hot enough or long enough. See above.
Why does my bone broth taste like water?
Your bone broth tastes like water because you didn’t use enough of the right bones and/or you didn’t cook your broth hot enough or long enough. See above.




47 comments
I can’t figure out if I’m doing something wrong…I try skimming every 10 mins for the first hour and a half and there is never anything to skim off!
Jaci
Hi Becca,
I’ll try and find a video about good skimming and insert it into the article for you.
As for replacing the water. I would replace all of the water that is lost / reduced before you add your vegetables. You can also replace more water towards the end as it reduces more.
Hope this helps!
connor
Connor at Bluebird Provisions
Hi Connor,
Thanks for the recipe, my house smells delicious! A couple of questions though: I roasted bones in the oven and then transferred to a roaster. I lost a LOT of volume though and I just saw your comment in the recipe to add water, if necessary, when using a slow cooker. What are the general rules there? Should I have added water last night when it had been cooking for 10-12 hours and the levels had gone down considerably? I’ve had the lid on the entire time and I wasn’t sure how to do the whole “skimming” thing so I didn’t do much of that. When I put my veggies in this morning there wasn’t a lot of liquid to cover them. Also, regarding skimming, is there a video out there anywhere that can show the correct way to do this? What am I skimming? I had bubbles when it was at a good simmer but never any foam. Thank you for any and all help you may be able to provide me!
Becca
Becca Hasbrouck
Hi Jaci.
You can cook it at the high temperature you had on the stove. I think your problem is that the fat from the top boiled into your broth, and it turned cloudy.
To fix this you really need to be diligent in your skimming for the first hour or so. After that do not ever stir or touch the broth (aside from to add vegetables ,etc).
You can also add more water back to replace what is lost during the simmer. OR you can place a lid on it while it boils to minimize the reduction and water loss.
Hope this helps and let me know how it goes.
connor
Connor at Bluebird Provisions
Hi! I am swtiching up what I did last time to try to get it to gel better this time. But I am having a bit of trouble getting it to the correct temp. I saw in your other article that 204-208 F is the ideal temp, but I started it out in my crockpot on HI and it only got to 195, so after 2 hours I switched it to the stovetop, since it also didn’t have any bubbles at all.
In order to get to 204-208, I put it on medium and it was still boiling somewhat, which I read was okay. However, just 45 mins on this setting made quite a bit of water evaporate and the broth turned cloudy and there was nothing left to skim. Medium low was 195 F, similar to HI on the crockpot, so too low. Is there a happy place in btwn? Thank you!!
Jaci
hi Susan,
I would just make two separate batches of bone broth, chicken and beef. Since the beef bones are large, they will be too difficult to break up.
Just make sure you cook it hot and it should be good to gel!
Connor at Bluebird Provisions
Hi Annalise,
Nope you can do this and still get the same results!
Connor at Bluebird Provisions
Hi Carol , I would give it a shot with those bones.
let me know how it goes!
Connor at Bluebird Provisions
Hi Connor! I don’t know if you are still monitoring this page or not but I decided to take a chance that you might see my post.
I was pleasantly surprised to see you take such care and concern with people who are wanting to make their own bone broth – I am one! 😂 I have tried to make bone broth once following another recipe before I found your site. It turned out watery and didn’t gel!😟. I ordered some beef and chicken bones and want to make a combined bone broth but the bones were each packaged in 5 lb. bags. Since you suggest 3.5 lbs. total bones I’m not sure the best thing to do. For one thing the 5 lbs. of beef bones are only about four pieces – four small and one large – so dividing it doesn’t seem like a good idea. Should I just make a beef and a separate chicken broth? I had rather have two kinds of good broth than one mixed blah one. The failure of my first attempt at bone broth has me second guessing everything. Oh, I make it in a crock pot and I have more than one so could feasibly make a beef and a chicken at the same time. Any insights and help you could give me will be much appreciated- I don’t want another failure!
Susan
Hi,
I was wondering if it matters to split up the first two steps. I blanched & roasted my bones, and I wasn’t sure if it was a bad idea to refrigerate them then continue tomorrow or the next day. Do you think it makes a difference? Thanks!
Annalise
My bones have been in the freezer for a couple years. Can I still make a good bone broth or should I toss them?
Carol
Hi Sam, drop them in whole. You want all the skin and connective tissue!
Connor at Bluebird Provisions
Hi Connor,
Thanks so much for sharing this information. I am planning to make chicken bone broth, and would like to know when using chicken feet and wings, does one remove the skin and meat and literally use just the bones (particularly for the wings which have more meat than the feet) before making broth, or just drop in the chicken wings whole as is? A naturopath suggested I take chicken collagen capsules, and bone broth seems like a much better solution!
Many thanks!
Sam
Great information. Been making bone for a little over a year. I have only made bone broth in an instpot. When done i put my in a glass jar with a lid and ring. The broth is very hot. Tip them upside down, on a towel, for 40 minutes and turn them back up until the lids pop and then I put them in the fridge until I need them. I just had some I made in October. Tasted like it always did. I have never heard of tomato paste. Might try it. Thanks.
Richard Martian
Hi Deb,
Some people will de-pressurize the instant pot and skim it once that way then turn it back on.
Others just leave it and it’s usually not a hug deal. Just make an effort to skim the oil / fat at the end of your total cook time and you should be ok.
Connor at Bluebird Provisions
You speak of making bone broth more quickly in an instant pot. I love the idea of completing the task quickly and no worries about cook time while sleeping. Obviously you cannot skim off impurities from a sealed instant pot. How should we work around this?
Deb Long
Deer bones make the best bone broth. Good luck! I am sure it will be delicious.
Connor at Bluebird Provisions
I have several deer bones in my freezer as my grandsons hunt and I would like to have a recipe for bone broth made from them…thanks
Diana
Hi Cassandra,
Yes 3.5 lbs bones would be a great place to start. 16-24 hours on low should be good for a crock pot. I say should because some brands differ on heat and it often takes a few batches to figure things out anyways.
Connor at Bluebird Provisions
Are the cooking times the same for the stove top and crock pot?
I’m going to use a 6 quart crock pot for my beef bone broth. I’m thinking to buy 3.5 lbs (does that sound about right so the bones and water resemble water and ice?)
How long should I leave it on high and then on low to simmer boil,
Would the total cook time still be 12 -24 hours or less?
Cassandra
Hi Jaci,
I would weigh the raw bones before you do anything to them. And always keep all of the fat, meat and tissue on the bones. These help with the gel.
By knuckle bones did they look like the ones in the picture of this article? Make sure they are either knee, hip or shank bones for best results in gelling.
You might need to use more bones and less water next time to be sure.
good luck and let me know how it goes!
connor
As for the temperature, was it visibly bubbling most of the time? The only other thing Ican think of is the bones were
Connor at Bluebird Provisions
Thanks so much for the clarification! I just have a few follow up questions:
I got knuckles from a local butcher, but after I roasted it, I noticed it weighed much less than it weighed when I first weighed it before cooking. Do you weigh your bones before or after cooking?
I noticed it is common for the knuckles to still have fat and meat on them when you buy them. Do you leave that on the bones for the broth or do you make sure you have 1.5 lbs after cooking, of just knuckle bones, with meat and fat removed?
I ask because I just finished a batch that did not gel and I am trying to figure out what went wrong. I am making it for gut healing so I know I need it to gel. This was all I could think of because I had it on high for several hours until I went to sleep for 9 hours, so I think the temp was fine.
Thank you!!
Jaci
Hi Jaci,
Sorry for the confusion. I would take the lid off as it begins to simmer / boil (usually within 45 minutes or so) and keep the lid off for 30 minutes while you are doing your skimming.
Once you there are no more foam to skim, you can place the lid back on the for the cook.
As for adding water. You do not need to if the lid is on.
And sometimes you risk cracking your glass jars if you pour it in too hot. Just let it cool for 30 minutes or so then pour into the jars.
hope this helps
connor
Connor at Bluebird Provisions
I am new to making bone broth for gut healing and love how detailed this article is, thank you for letting us in on your secrets!
I saw someone else asked about crockpot instructions. You said to “cook it on high for the first 2-3 hours. Then remove the lid and skim the impurities and foam as it rises over the first 20 minutes to 1.5 hours.”
I am a bit confused about the 2nd part, so I want to make sure I am understanding correctly: I would cook it on high with the lid on 2-3 hours, take lid off and keep it off for 1.5 hours, skimming the fat off 2-3 times, then put the lid back on and cook on low for 24 hours after that (24 hours because I am using beef bones)?
For the crockpot, do I need to add water back in at any point in the process if it cooks down enough that it no longer covers the bones? If so, when should I take the lid off to check on it?
Should I let it cool completely on the counter before putting it in the glass jar and into the fridge? Or does it not matter too much?
Jaci
Hi Judy,
Sounds like you make some delicious broths! You can leave the chicken bones in with your beef ones as long as you wish. If you ever notice the taste is a bit ‘metallic’ that is usually the cue to reduce the total cook time for the chicken bones in my experience.
As for lemon. I would add it fort he last 3-6 hours or so of your total cook time.
hope this helps and good luck!
connor
Connor at Bluebird Provisions
Hi. Best article ever!! Thank you from Bellingham!! I’ve been making bone broth for about 3 years. I made it continuously during Covid and had some every day. It was my security blanket. Anyway, I mix different bones; chicken, beef, lamb, whatever I have collected. Usually it’s about 50-50 beef to chicken and I use chicken feet when I can get them. I roast the uncooked ones beforehand. Just curious…what do you think about the cook time. Chicken takes less time than beef. Is it okay to cook chicken bones for the full time that I would cook the beef bones (usually 48 hours)?
Also, I’m wondering about the lemon in your beef bone broth recipe. When do you add the lemon? I think lemon would be delicious in the chicken bone broth. In all my broths, I’ve been known try different things like adding curry powder, seaweed, steak sauce, instant chicken bouillon, chicken gizzards. Once I made turkey bone broth and threw in mashed potatoes and stuffing at the end. It’s all good. :)
Judy
Hi Stella,
Yes you can absolutely reduce the stock down to save on freezer space when you freeze it. In this case I recommend straying everything first, then adding your stock back to the pot.
From here you want to bring it to a boil and let it boil for 10-20 minutes. Check throughout to see how much it is reducing. Then simply take it off the stove top when you reach your desired level of liquid.
This way you have a concentrated stock in your freezer. You can re-add water to it once thawed to your desired level of flavor or taste.
connor
Connor at Bluebird Provisions
Hi Ale,
Great question! It makes about 10 cups or 10 servings or bone broth. This works out to around 2200 to 2500 ml total.
Connor at Bluebird Provisions
Hey absolutely love this…just wondering why you would reduce your stock down further for more freezer space?. Surely that gives you less stock? ..or am I missing something here…do you use some.of the stock and add to hot water? As I have bought a stock before where I use a spoonful of it and add boiling water? I just thought I sorted what I made and.then drank it as desired so surely I would want to make a s much as possible out of a batch?
Stella
Hi Connor,
For the chicken recipe, how many ML or servings does?
Thank you for sharing :)
Ale
Hi Jennifer,
Woah nice work on getting a gel on your first try! That is so awesome and inspiring.
Regarding using conventional chicken bones. If it is all you can get, then keep doing it. Some bone broth is better than none.
That is great news about your beef bones! Keep me posted on how it goes. I’m jealous of your cow share. I need to get my act together and do something similar.
Make sure you cook the beef nice and hot and you should get a good gel on it as well.
connor
Connor at Bluebird Provisions
Hi! Stumbled onto your website and LOVE it! I made my first chicken bone stock by accident and when it gelled, I had to research as I though something had gone horribly wrong …. hahaha … then I found that I had actually achieved something many only dream of.
My question is: I have mostly used grocery store chicken for my bone broth. Is that dangerous? Am I endangering my health? I am on a tight budget and cannot afford to purchase the high dollar ‘safe’ meats.
My son-in-law & I split a quarter cow that was grass fed, no hormones and as I work through my beef, I freeze any bones and will make my first attempt at beef bone broth with the ‘good’ meat.
Jennifer
Hi Terri,
Thanks for your comment, glad you are making some bone broth! Unfortunately I am not able to share where we get ours from as we have contracts in place with our suppliers and we are currently buying all of their bones. Bones and feet are in short supply, so I’m not able to publicize sources because our competition will find out.
Sorry i know this sounds silly but it’s a real issue in our industry.
Connor
Connor at Bluebird Provisions
Thanks for all the recipes and advice! I am having a hard time finding chicken feet. Could you pass along the bc company you use to order your bones? Thank you so much!
Terri Dragatis
Hi Paj,
In your case since you are experienced in making bone broth, I would recommend covering your bone broth.
As you mentioned, this will reduce the amount of water you need to re-add back to the pot. But it will still keep a delicious and concentrated bone broth, as long as you simmer it for long enough.
When we make our bone broth, we use both techniques in the past. But we ultimately settled on covering our lids in the long-term for these reasons above.
Hope this helps and let me know if you have other questions.
connor
Connor at Bluebird Provisions
Hi. I found your article very helpful- especially compared to several others that I came across, thank you!
I have a question I have been searching for a reliable answer to:
I am using a large (restraunt style) pot to slow cook my bone broth over a low flame that has a rolling boil. At first I had it covered (with a hole in the lid to let steam out) and let it slow cook for a few hours, but noticed the water level was drastically lowered- to the point of some bones uncovered. I read another recipe that said to NOT cover the pot and let it slow, rolling boil- so as not to evaporate the water too quickly; also said I could add more water- enough to cover bones,
I am finding contradictory information regarding using a cover or NOT using a cover while slow cooking my bone broth over a slow boil, low flame. Either way my water level keeps dropping (too soon for the 12 & 24 hour cooking mark)! Which way is best in slow cooking my bone broth? Also, if the water level keeps going down to uncover some of the bones (they are large knuckle ones), should I be adding more water or it will end up being way too much added?
Thank you for your help and advice!
Paj from Italy
Paj Tognetti
Hi Carolyn
Your bone broth should still gel once you place it in the fridge. It will not gel at room temperature if that is where you are storing it in cans.
connor
Connor at Bluebird Provisions
As for storing homemade bone broth, I have pressure canned it so it is shelf stable and easy to use. But I notice it no longer gels. Do you advise against pressure canning bone broth?
Carolyn Roman
Hi Agnes
I would cook it on high for the first 2-3 hours. Then remove the lid and skim the impurities and foam as it rises over the first 20 minutes to 1.5 hours.
I would also leave the excess meat on your carcass next time. It is great for adding depth of flavour and more gelatin to your bone broth.
It sounds like you had a pretty great and rich broth from your overnight cook. You could try using the high heat setting next time to see if it makes your bone broth thicker and stronger.
You don’t need to add any vegetables. They are simply for flavour and don’t add any nutrition.
Hope this helps and let me know if you have any other questions about making bone broth.
Connor
Connor at Bluebird Provisions
Hi, how and when should I skim when making bone broth in a slow cooker/ crock pot? Mine has High, Low, and Auto, auto being High until it’s reached a particular temperature, then it reverts to Low.
I’ve just made my first ever, with an organic cooked chicken carcass, and although I stripped every scrap of meat and skin off the carcass before putting it in my crock pot, I got another 1/2 bowlful of scrappy meat off the bones as I was fishing them out.
I put those scraps into my mini blitzer along with a few soupspoons of the sieved broth and now have a thick chicken paste that I’m going to try to use as a base for a soup of some sort. Do you have any other suggestions as to what I could use this meat for?
Also, I put the crock pot on Low at 10pm last night, and strained it all out at 3pm. Should I have cooked it on High, and for longer? The strained liquid is fairly clear, with fat content (I don’t mind that), despite me stirring it out if habit a couple of times, partly to help the bones lie flatter in the water when they started to come apart from each other, but all the bones are still pretty hard. None of them felt soft when I was fishing them out.
Lastly, is it imperative to add the listed veg? I just put the stripped carcass in the crock pot with only the lemon and onion that I’d put in the cavity to roast it with. I appreciate that individual veg will add their own nutritional factors, but I’m making bone broth primarily for the collagen and amino acids and wondered if it was essential.
Your advice appreciated! 😊
Agnes
Hi Kristine,
As far as the apple cider vinegar is concerned, I’ve written about it here: https://bluebirdprovisions.co/blogs/news/expert-wrong-making-bone-broth
It is unnecessary to use apple cider vinegar as it does not really add any benefits to your bone broth.
For the fat on your bone broth, I would recommend trying a cup of broth with the fat kept on it. Just stir it in as it warms up. Then compare this to a cup of bone broth with the fat removed. Which one do you prefer?
It really comes down to personal preference as to whether you should remove the fat or not. Dieters may remove the fat to save on calories. While keto or other folks prefer to keep the fat on.
Connor
Connor at Bluebird Provisions
Thank you for sharing this great info. When I have made beef or chicken bone broth I have done for maybe 8 hours and then strain and put in the fridge overnight. Then in the a.m. I remove the fat from the top (because it is hardened on the top). I just want to confirm is that OK to do or should I leave the fat on? Also I was told a 1/3 of a cup of Apple Cider Vinegar was good to put in your stock pot? I would like your thoughts on that? I now know I must keep on the stove much longer than what I am.
Kristine Boutette
Hi Mary,
If you have a cooked chicken then you do not need to roast the bones again before making bone broth.
Connor
Connor at Bluebird Provisions
Do I need to roast bones if they’re from a cooked chicken
Mary
I’ve always used cooked chicken bones and skin with vegetables and herbs to make broth and freeze in containers for cooking purposes. I’ll be 80 soon and diagnosed with the beginning of osteoporosis 30 years ago-never progressed. I also have had benign positional and meniere’s vertigo in my lifetime-taken many falls but so far no broken bones or put on osteoporosis meds. Very active and exercise regularly as well as an AirBnB host for 3 years after retirement from our other careers.
Mary Ann
Hi MaryAnn,
I’m so glad you found that bone broth recipe article useful. It takes a lot of time to shop, prepare and make bone broth. But it’s worth it!
Yes I would try the saute feature for 30 mins or so, then stop and skim everything out. Then cook for 3-4 hours. Please let me know how it goes
Connor
Connor at Bluebird Provisions
Thank you so much- your article was super informative! As a 78 yr/o with a broken ankle, bone broth was recommended by my physical therapist for the best source of healing collagen. So made it first time yesterday! Not too bad for a first attempt but when I read your article I loved your idea of roasting the bones in the oven first! Plus not knowing anything I used only marrow bones-will add knuckle bones next time! And the pictures of the various bone types were so helpful – otherwise I’d have no idea of what I was looking for!!
I used my 3 qt instant & cooked it for 3 hrs(with veggies, bay leaves etc.
Question- if I roast the bones then add them to instant pot, how do I cook them for 1&1/2 hrs so I can skim off the impurities? Would leaving it on the sauté setting do the trick before sealing it to pressure cook for 3-4 hrs?
Anyway- Super terrific article!!!
MaryAnn Clay
Leave a comment
This site is protected by hCaptcha and the hCaptcha Privacy Policy and Terms of Service apply.